Used resources:
Basic process
Warning
This page is WIP, the content may be inaccurate
Use the camera frustum to cull some meshes.
The visibility problem
we have to account for visibility, some triangles are hidden by others. This is solved using a Z-Buffer (also called Depth Buffer). The depth value is relative to the camera. So when we have a set of pixels to draw on the screen, we compare the depth values of each “I want to paint this color here” pixels, and if we have the lowest depth value we are drawn “above” the other “previously” drawn pixels RGB. This is a bit more complex because each vertices may have a different depth values.
Process at high level

Vertex shading
In short: We move all triangles from the world to the 2D view screen.
From the vertex position, get a XY (+depth) screen position, this is done by going through the following spaces:
- Model Space (We use the initial position of the vertex)
- World Space (We apply on the vertex the model world position, rotation and scale)
- Camera Space (We get the camera position, rotation and FOV)
- Screen Space
common vertex shader will just transform the vertices from local space to world space by multiplying them by the MVP, the Model, View, Projection matrix.
Rasterization
In short: From the screen coordinates of the vertices we find which pixels should be colored what RGB color **In short: Rasterization is just the process of converting a line into pixels.
For each triangle, get the 3 vertices and figure out what pixels should be painted from it. The pixels are then shaded using the texture/color assigned to the triangle.
This means we turned triangles into fragments. Fragment = group of pixels that come from the same triangle and share the same texture/color
Your Pixel/Fragment shader will come afterwards where you take that pixel data and do something with it to output a colour. In most cases it’s sampling a texture
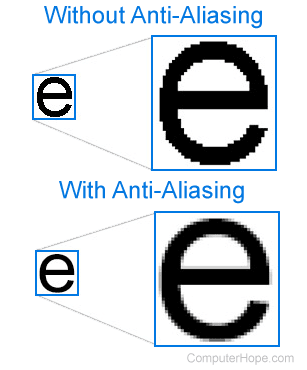
One other issue with rasterization, is weird pixelated edges because not all triangle lines will perfectly match the pixels.
We use anti-aliasing techniques to solve this problem, each have its pros and cons.
For example, Super Sampling Anti-Aliasing (SSAA) distributes 16 sampling points to each pixel, when a triangle cuts though a pixel, depending on how many of the 16 sampling points of the triangle covers, a corresponding fractional shade of that color is applied to the pixel, this will result in faded edges.